Have you ever uploaded an awesome photo to your WordPress website or blog, and then have it take 12 seconds to load on the page? Or maybe you’ve wanted an image to take up more or less space on the page. You can do these types of edits right in the backend of WordPress. So here’s how to resize images using WordPress.
First, here are some basics. When we talk about image size, that means the space the image takes up on the screen. This is measured in pixels. Although they range, a common width of a website is 1000 pixels. So if you’re creating a banner image that needs to go across the entire width of your text, you might make something that is 1000×300 pixels.
The image file size is how much the image weighs. This is measured in bytes. Specifically in web design, you’ll be measuring Kilobytes or KB. If you upload an image and the weight of that image is being measured in Megabytes or MB, then the image is much too large.
So how do you know what size your images should be?
A large image, like a banner or something that takes up the entire width of your text, should be between 60K and 120K. A small image that is within your text should be 50KB or less.
Pro Tip: If you’re using Firefox, when browsing the internet, right click on any image and go to “view image info.” A window will pop up that shows you the dimensions and the weight of that image.
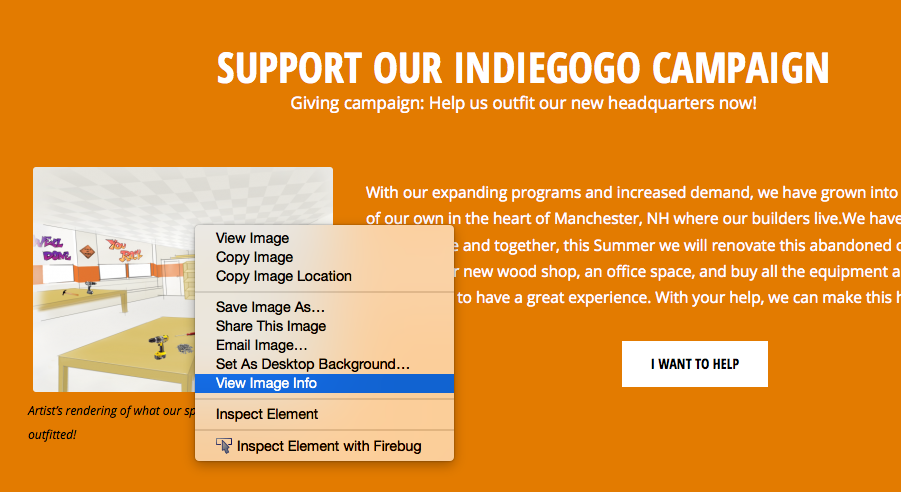
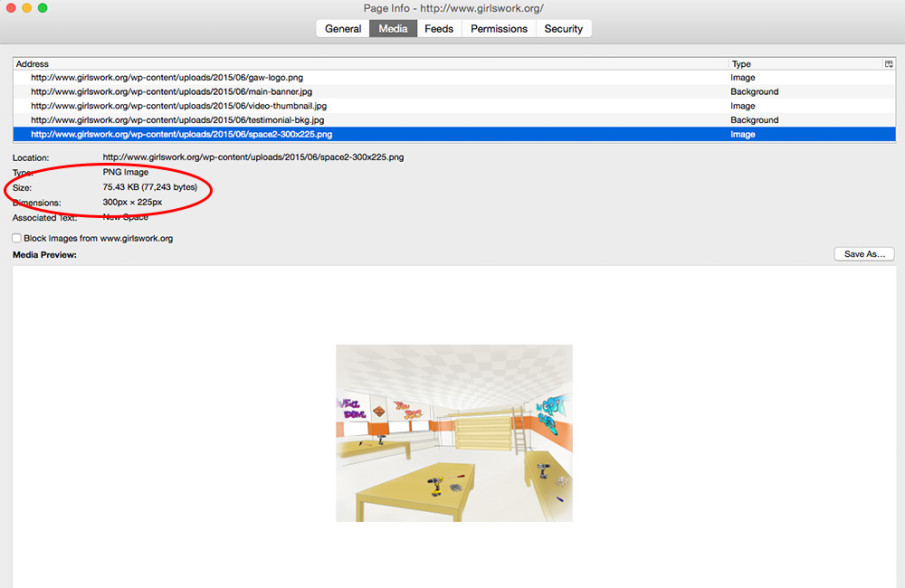
You can quickly check the size of your own images using this trick to make sure they’re how you want them, without having to log in to WordPress.
So, now how do you edit an image to make it your desired size and weight? You don’t have to have access to photoshop to get this done if you’re using WordPress.
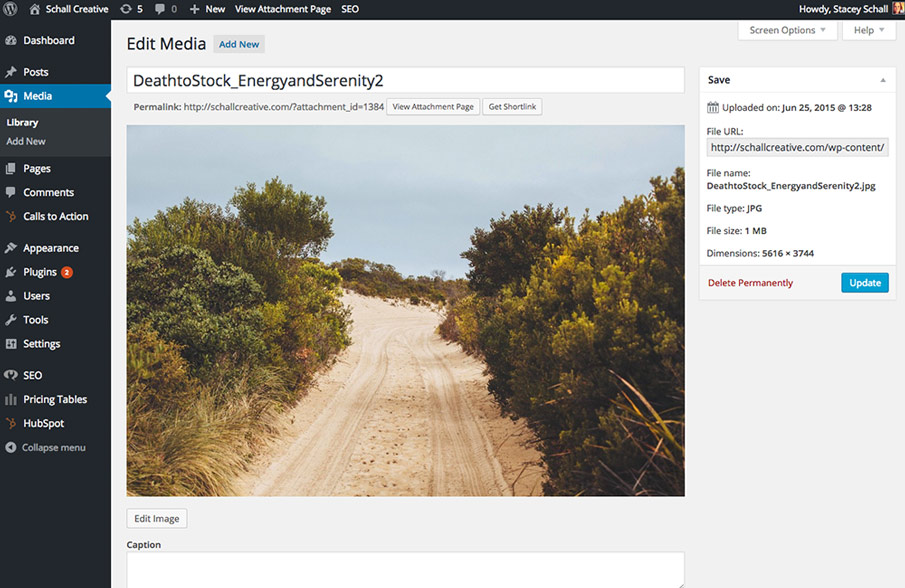
1. Upload your new media.
In the Media section, simply drag and drop or select a file from your computer. Once it’s there, click “Edit.” The image I chose is over 1 MB. Way too big.
2. Scale the image.
Click Edit Image and scale the image to your desired width. In this case, I made it 1000 x 667 pixels.
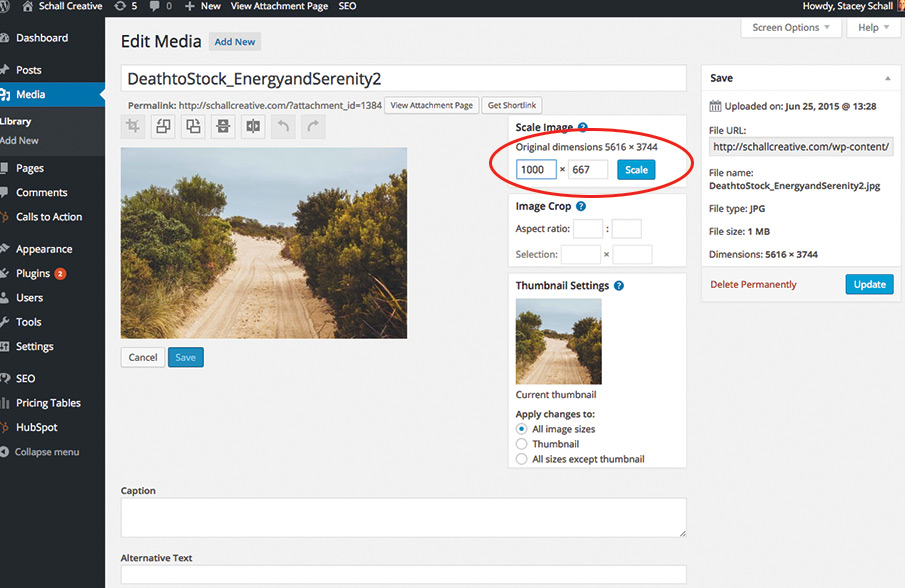
3. Crop the image.
I also want to make sure it’s only 300 pixels high, so I’ll use the crop tool. I click and drag the section of the photo that I want to keep. It will tell me the size of my selection in the image crop box. Click the crop tool to make this happen.

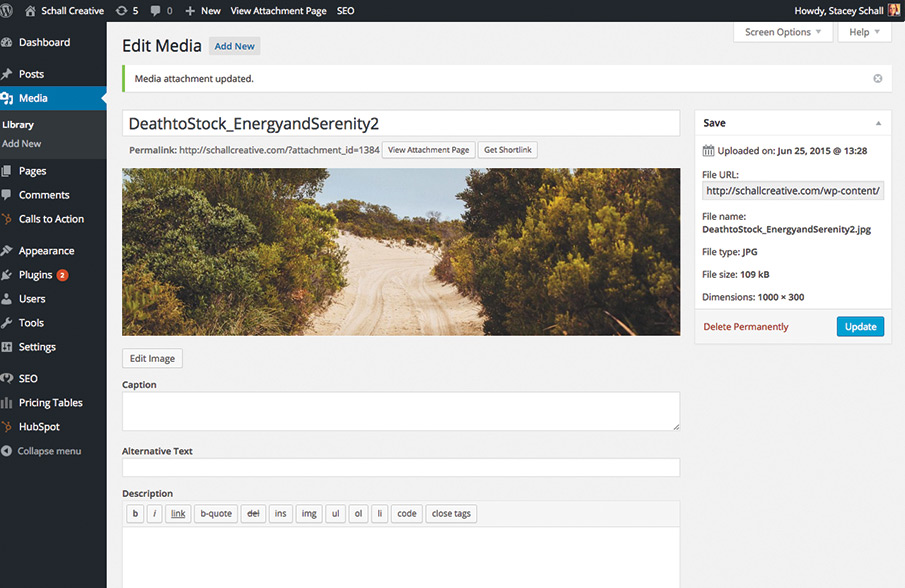
Then hit save and then update. You’ll notice that my file size changed dramatically when I made these updates. It’s now 109KB, a perfect size for a banner on my blog post. If yours still weighs too much after it’s cropped, you may have to compress the image using a third party software.
4. Insert the image.
Now, when you go back to your post, you can insert the updated image.
And that, my friends is how you resize images using WordPress.